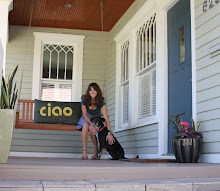
For the past while, I have been carrying around some heavy tools in my purse, consisting of a full size hammer, 25ft construction grade tape measure, Phillips head screwdriver, and my Canon 40D camera with zoom lens. These things come in handy both in my clients' homes, and when I am thrifting, as I often have to measure and unscrew things to fit them in my car. Needless to say, my shoulders and neck hate me.
For my upcoming birthday, I decided to ask Tyler for some new purse accessories to lighten my load. My new toys arrived yesterday, and I am super excited to tote them around today in my much lighter bag.
My new acquisitions include a smaller 12' tape measure, an all-in-one hammer/screwdriver, and a compact Canon G11, which I have been dying for since the photographer that shot my house a few weeks ago raved about it.
Wednesday, September 15, 2010
Monday, September 13, 2010
#235...playroom decor
My client Nicole wanted to decorate and pull together her playroom. The room was already painted red, so I suggested adding some graphic art to make the deep red color more playful. Inspired by this & this diy on design*sponge, I created some oversized silhouettes of her boys and her dog.
I followed the directions exactly to make the striped dog silhouette, but for the boys I had to modify the directions a bit, as they call for you to print your profile on 8.5" x 11" sticky back label paper and then adhere to your canvas. The canvas I was using was 20" x 20", so the heads would have been too small if I printed them on the label paper. Instead I blew them up to the size I wanted, and using carbon paper traced the profile onto the canvas.
Next I used a small paint brush and traced around my line with black paint.
Then I began filling in the area outside the profile with black acrylic paint, leaving the profile white. I used several coats of black, and then finished them with a matte acrylic varnish.
We also made a magnetic board for the wall to fit inside the molding. To create the magnet board I used aluminum flashing sold in a roll in the roofing section of HomeDepot. I had to cut the metal using tin snips, which was a bit of a challenge, but I was able to smooth it out fairly well afterward by hitting it with a mallet. I sanded the edges of the metal to dull their sharpness. Nicole painted the metal to match the wall color and using industrial strength velcro adhered the board to the wall.
I also made this cute elephant pillow to help tie in the blue and white stripe chair that was already in a corner of the room.
Friday, September 10, 2010
#234...ding dong
For the past 7 years, there has been a small hole in our house siding on the front porch where a doorbell button should go.
This summer, I finally got sick of the hole, which had wires that were hanging out of it until I pushed them inside it about 5 years ago, and decided it was time for us to install a doorbell. I chose this doorbell from the House of Antique Hardware. I think it is more of a Victorian style than Bungalow style, but I like its quirky directive. Now, if we can only get the chime that it is connected to inside the house to work, we will be in ringing business.
Labels:
splurge
Wednesday, September 8, 2010
#233...the power of pattern
My client Amanda was tired of the traditional and monochromatic look of her burgundy couch
and burgundy, green and gold striped wing chairs.
So, we decided to modernize them by adding some bold graphic patterns in the form of pillows. We chose this Suzani-like fabric from Calico Corners and an upholstery Ikat print I found at a local discount fabric shop. I think the patterns really take away the overtly traditional feel of the furniture and are such a pretty and fun compliment to the stripe and burgundy solid.
Labels:
decorating
Monday, September 6, 2010
#232...pencil can
I had high hopes of cleaning out my garage this Labor Day holiday, but it is a rainy, dreary day; so I decided to stay inside and clean up my computer area instead. I needed a pen/pencil holder, so using an empty aluminum cat food can....
I cleaned it out and removed the paper......
and wrapped it in fabric using this double-sided tape (it is my favorite)
Labels:
ideas
Friday, September 3, 2010
#231...anniversaries abound
Tyler and I share our anniversary date with my brother Mike and sister-in-law Kelly. This weekend they will celebrate a first year together, and we will celebrate a dozen.
The day after their wedding last year, a bunch of the bridesmaids bouquets made it to my parents hotel suite, and I attempted a photo shoot using the sofa pillows as backdrop. The out of focus polka-dots are a bit dizzying, but the flowers look as pretty as I remember.
Happy Anniversaries and Happy Labor Day!
Labels:
about me
Wednesday, September 1, 2010
#230...sara's nursery for #3
Last year, I helped my client Sara decorate her daughter Isabella's room....you can see it here. In a few short days, Isabella will be getting a roommate (her little brother Diego) to make room for baby #3 that is on her way. To help make Diego feel welcome in Isabella's room, I made him a navy polka dot pillowcase for his bed, and both Isabella and Diego now have applique initial pillows on their matching beds.
Diego's old room is going to be the new baby's nursery, and Sara wanted to change as little as possible, but bring a little femininity and freshness to the room. The room has pale yellow walls, white furniture, a yellow terry cloth rocker, and this striped Roman shade.
I had several yards of Alexander Henry's 2D Zoo print that I bought clearanced several years ago that seemed to compliment the colors in the striped shade. With a few coordinating cotton prints that I bought at JoAnn fabrics, we made over the nursery from boy to girl.
First, I made a simple slipcover for her rocker ottoman.
We purchased this print from etsy of a Spanish animal alphabet.
(Sara's kids are bilingual)
I framed it in a simple metal frame and decided to embellish the mat by cutting a scallop border out of fabric and using double-sided tape, stuck it to the mat.
I recovered Diego's old train themed bumper pad using the 2D Zoo print and coordinating fabrics. We paired it with this dark (looks light online) pink lattice print crib sheet from the Dwell Studio for Target line.
I made the monogram above the crib by simply printing out some letters, blowing them up, cutting them out of fabric, and appliqueing with a zig-zag stitch onto another fabric. I then centered, stretched and stapled them onto some blank square canvases.
Here are a few more pictures of the nursery's quick change new look. Also, please note, the side wall is off of the crib because Diego has not quite moved out of the room yet........poor baby, he does not know what's about to hit him..........he's moving in with his big sis, and a new little sis is about to steal Mom away!
Labels:
decorating,
sew this
Subscribe to:
Posts (Atom)