Saturday, November 30, 2013

#388...chalk owl

I bought this black canvas at the local art supply to hang in an unfilled corner of my back den. (I had an extra wood floater frame that I put it in seen above).
I decided that I wanted to paint an owl on the black canvas using white chalk pen. Owls are wintry right? (I'm still decorating for the home tour next weekend.) I perused Pinterest for some owl inspiration and came across Picasso's simple line drawn owl, which I really liked, and knew I could recreate.
I used a 6mm and 1mm version of these chalk pens and set to work.

The shape is so simple and minimalist, it was easy to recreate with the chalk pens. I looked at a bunch of line drawn owls for inspiration, and most of them looked really cutesy and juvenile, but not Picasso's. I guess that is part of his genius. Here is my finished owl in his new home.


Monday, November 25, 2013

#387...floating media cabinet

Tyler recently built this floating media cabinet inspired by something he saw in Dwell magazine.
Our old media cabinet consisted of two Ikea cabinets pushed together, atop which sat an old, heavy, large rear-projection TV. We upgraded our TV to a wall mounted unit this summer, which led to the freedom of a wall mounted media cabinet design.
For the cabinet, Tyler salvaged a few old pieces like this dresser above and an end table. He built varying sized boxes to house his electronic components and attached all the pieces to the wall. He wanted the elevations of the boxes to be staggered in height and depth, and put much thought into how the different pieces could work together across the wall to create a unique look for the piece. Here are a few shots of the cabinet in progress.


...and here is the finished piece


Sunday, November 17, 2013

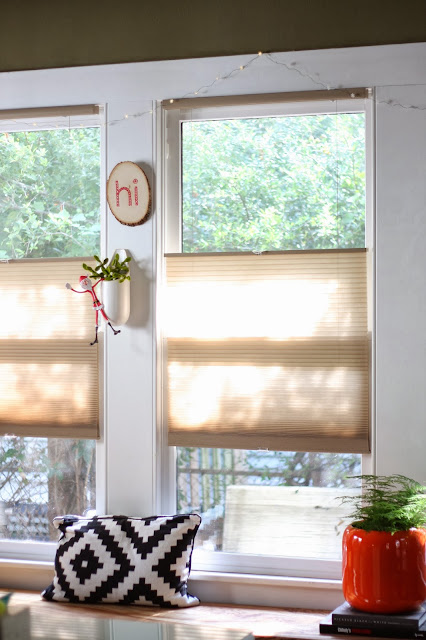
#386...wood slice cross stitch

I bought this wood slice at the Goodwill a few years ago and recently found it in my attic.
I decided to try cross stitching the word "hi" on it to use as indoor holiday decor.
First, I printed the word in the size I wanted to fit on the wood.
Next, I pulled out my carbon paper, some red embroidery thread and a needle.
I traced the "hi" onto the wood using dot marks.
I should have pressed harder making my dot marks, as they were very faint on the wood.
Using a very small drill bit, I drilled holes through my dot marks.
 I threaded my needle and started cross stitching.
We've been doing a lot of unglamourous household maintenance projects lately getting ready for the holiday home tour coming up in a few weeks. It felt good to spend an hour making something crafty.


Tuesday, November 12, 2013

#385...e-board designs

Here are a few room design e-boards I recently created for clients based on their needs and personal styles.
master bedroom


living room


dining & living Room


family room


dining room


deck & yardscape


sister & brother bedroom


living room

master bedroom

Thursday, November 7, 2013

#384...repurposed denim chair

My parent's bought this chair in 1972 when they were first married. It came to live in my house recently and has a prominent spot in my dining room.
While the gold chenille fabric is wonderfully vintage, it was worn and brittle in some spots, and needed to be recovered.
Tyler had the idea that we should cover it in denim. I took it one step further and decided we should cover it in reclaimed denim from old pairs of jeans. I collected several pairs of denim from the Goodwill in varying shades of blue. I spent about 5 hours cutting up the pants and sewing them into a fabric that the upholsterer could use for the chair. Unfortunately, I forgot to take a picture of the pieced denim fabric I made before taking it to be upholstered.
Here is the finished chair back from the upholstery shop. It's quirky, and I really like it.


Sunday, November 3, 2013

#383...ipe going gray

When we built our cabana a few years ago, we loved the dark look of the freshly oiled Ipe wood. We thought we could maintain this look, and our cabana Ipe would look as good as this Ipe deck does (pulled off Houzz) forever.
But alas, we can not keep up the rigorous maintenance schedule to keep the Ipe looking like this. So, we have decided to let our Ipe go gray, hoping it will look like this someday.


This picture above is still in the process of graying I suspect. If left untreated Ipe will weather to a silvery gray color. Since we had once oiled our wood, it had weathered to kind of a dingy reddish brown color. We decided to sand off the top layer of the old oil to help let the Ipe gray. Tyler did all the dirty work on this project.

Above you can see the previous layer of remaining oil to the right of the orbital where he had yet to sand.
Above he had finished sanding the lower deck and pool facing, but had yet to sand the roof pergola facing. Below is the finished sanded Ipe. We are super excited for our wood to gray and to be maintenance free.