Friday, February 26, 2010

#147...fairhope, alabama

Last weekend we took a road trip to the  charming little town of Fairhope, Alabama, to visit friends who recently moved there. Fairhope is located on the eastern shore of Mobile Bay. These are a few shots from the trip.


The town is an artist's community, and is home to the Eastern Shore Art Center. My friend Lisa and I walked over to the center to check out the pottery classes they offered and stumbled upon the work of Alabama artist Tres Taylor.

Taylor's installation is entitled "Amaze" and is a mural wrapping around 100 feet of the art center's central gallery, and is made from more than 300 square feet of plywood and roofing paper which Taylor says he tranformed "into an emotionally moving journey toward self-illumination." The mural is colorful and whimsical and here are a few of my shots from the exhibit.


Taylor’s signature subjects –monks, are present throughout the work, and  at the center of the installation lies a labyrinth, "an ancient symbol representing the expedition into one’s own being and back out into the world." You can read more about this exhibit here and see additional photos here.

While working on Amaze, Taylor held a workshop for children where he collaborated with them on an art project from which the proceeds will benefit outreach programs for children throught the Eastern Shore Art Center. They used splatter paint techniques on tar paper to create houses, birds, fish, boats, which lined the hallways of the center, and were for sale for between $5-$10 dollars. These are the houses that I bought, now I just need to figure out how I want to frame them. I love splatter paint art.....which maybe you can tell by the splatter art banner I made for this blog.

Wednesday, February 24, 2010

#146...light switch decor

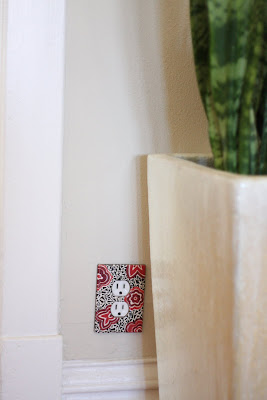
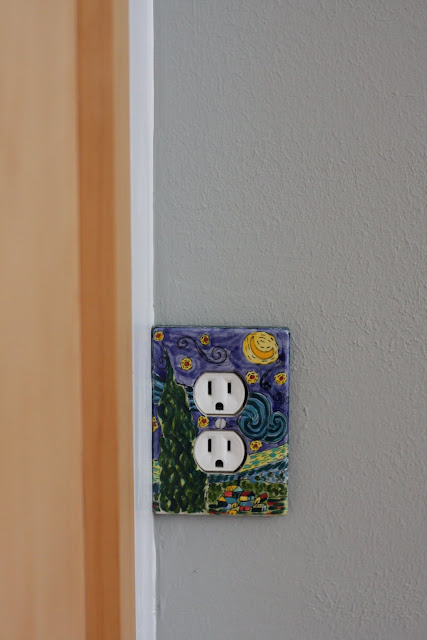
Decorated light switch plates definitely are considered kitschy....not really a decorating style many strive for....I however, secretly love decorated light switch plate covers and have a few sentimental ceramic wall plug covers scattered throughout my house (above and below) that I painted years ago when I owned a paint-your-own pottery shop.
I am not advocating putting decorated switch plate or wall plug covers on every outlet in your house, but I think they can add a bit of fun and whimsy to closets, laundry rooms, hallways, and garages. It is really easy to make your own using fabric, bits of wallpaper or old maps, and Martha Stewart Living has quick easy tutorial here.....or you could support Etsy artists and buy one of these.


Tuesday, February 23, 2010

#145...pets on furniture (take two)

My cat Gig'em made it onto Pets on Furniture on Desire to Inspire yesterday. Last month Mazie (my border collie rescue was on)...two pet photos down, one to go!

Monday, February 22, 2010

#144...legwarmers

photo by Deborah Jaffe for Hollywood Knits Style
This past weekend we went on a road trip, and I had many hours in the car to finish knitting some legwarmers that I started knitting over 3 years ago. The above picture is from the book Hollywood Knits Style by Suss Cousins, and were originally designed and knitted by Cousins for Jennifer Lopez in the movie Shall We Dance.


The pattern was fairly easy to follow, requiring only knit and purl stitches. Below are my finished legwarmers. Unfortunately, I knit them with a scratchy wool blend that started itching after I had them on for two minutes, so I guess I'll have to wear them over tights in the future.

Friday, February 19, 2010

#143...my bathroom remodel

When we bought our bungalow over six years ago, the bathroom looked like this 
At the time, we had so many rooms to tackle that we did a half renovation of the bath, putting in a new shower, toilet, and wallboard. We laid new floor tile, but never finished cutting or laying the perimeter pieces. We never finished the floor molding, and we repurposed the old sink (I painted it turquoise) with the intention of someday putting in something nicer. Below is the point it was at as we entered 2010.

One of my New Year's resolutions was to finish this bathroom, and with my Dad's help I did it while Tyler was out of town eariler this month
The first thing I did was to rip out the old sink and finish the long overdue tile job and floor molding. With the help of my Dad, we moved the electrical plug lower down on the wall, so that I could house plug-in items inside of a cabinet.
I purchased components from the Lillangen cabinet system from Ikea to use as my sink base, and then I cut a piece of birch plywood from Home Depot for the top.
Again with my Dad's help (and a jigsaw), I shaped the top of the sink and cut a hole in it for the plumbing to fit through. I bought the marble sink on discount over five years ago, and the faucet is from Lowe's.
I wanted my new bath to be modern and uncluttered, but I also wanted it to be spa-like and pretty. I got inspired by this page from House Beautiful, march 2010
....and here is my finished bath
other notes about the bathroom....
  • the wall cabinets above the toilet are modified versions of the Bjorken from Ikea
  • the cabinet fronts are painted in enamel with Boucle from Pratt and Lambert
  • the ring pulls are these
  • the square abstract painting is inspired by this artist
  • the birch sink top is finished with tung oil
  • the light fixture is here
  • the shower curtain is made from 6 yards of Calico Corners fabric (it was a splurge)
  • the crab and fish ceramic tiles in the shower were painted, fired and installed during phase1 six years ago

Thursday, February 18, 2010

#142...bath door facelift

My bathroom door needed a new coat of paint, and I took the opportunity to turn it into a piece of art.
door before
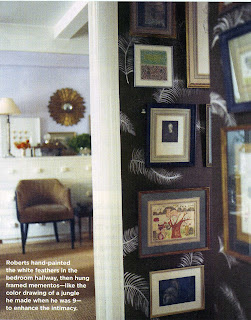
I got inspired by this picture that I had ripped out of Domino magazine featuring a hallway hand painted with feathers.
I painted the interior panels in Sea Haze by Benjamin Moore and painted the feathers with white enamel and a small round artist's brush.
On the inside of the door, I added mirrors to the panels, which really makes the bathroom seem big when you're in it with the door shut.
Tomorrow I will post the final pics and end result of my bathroom makeover.

Wednesday, February 17, 2010

#141...bath mirror makeover

mirror before
In my bathroom renovation I've been working on, I decided to reuse the mirror that I already had in there. I got it several years ago at HomeGoods for $40 because it had several dings and worn spots on the silver frame. I wanted to give it a facelift, so I used artist's tape (white thin tape) to tape off a horizontal line design, and blue painter's tape and parchment paper to cover the mirror.
I spray painted the whole thing with several light coats of Rustoleum White Lacquer from Home Depot. I peeled the tape off while it was still wet because once the laquer dries on top of the tape, peeling it off takes the whole paint job off.
mirror after