Monday, August 30, 2010

#229...edison light bulbs

I put an edison style light bulb in my lamp with the yarn wrapped lampshade since the bulb is semi-exposed, and I hoped it would cast a warm, yet not blinding glow.
It is a really pretty bulb that features an old-time carbon or tungsten filament in which you can see the loops and curves of the filament burning. Below is a better example than the above pictures I took.

Such bulbs were used at the turn of the 20th century. They come in various shapes and sizes, and really make a statement in an exposed bulb fixture or lamp. The downside to these bulbs is that they are costly, and they are not energy-efficient, making them impractical to use in multiple fixtures. They use about 40 watts of electricity and only put out about 6-10 watts, which is why you can see their swirly glow.  I am really happy with the look of the bulb in my lamp, and it is in a prominent spot in my house, so I feel O.K. about the energy waste....plus I only have one. Check out School House Electric for edison bulbs and really pretty historic lighting fixtures.

Friday, August 27, 2010

#228...buttons abound

Tyler's navy blue blazer had lost a few buttons. (This is not him above, just a blazer example). I searched the local fabric stores and was disappointed in the quality of gold blazer buttons they had to offer; however, at the thrift shop some very nice shiny gold buttons caught my eye on a vintage men's blazer. They really don't make things (even buttons) like they used to.

I purchased 3 thrift shop blazers each with really nice quality buttons. Tyler chose the buttons for his blazer, and I replaced them. Afterward, I was left with a lot of gold, nautical inspired buttons that needed a home.

I clustered them together and stitched them onto the above cotton tank, adding some jewelry to my top.
I made the tank from some Liberty of London fabric that I got on sale at a local shop. Below I attempted to model it, to show the tank in action.....of course I had to crop my messy mop of  hair out of the shot as not to distract from my top.

Wednesday, August 25, 2010

#227...botanicals for the wall

Many years ago, I painted these botanical canvases for my cousin Marie's living room. They hang above her sofa, which you can not see in the pictures because her 94 year old grandmother was sitting on the sofa at the time, and asked NOT to be in the picture.

The painting grouping got me thinking about how popular and inexpensive it is to use book pages, especially botanicals, to create gallery artwork for a large wall. Here are a few pictures of botanical groupings found through google images. With some inexpensive Ikea frames and a used book, you can have a gallery of art for a steal.

Apartment Therapy did a post on their favorite botanical books for framing. Jenny of The Little Green Notebook wrote about botanicals on black paper. Grace from design*sponge points out that the New York Public Library's digital gallery offers free printable art, and Erin from Elements of Style recommends Panteek for botanical images.


Monday, August 23, 2010

#226...sewing in a sea of beige

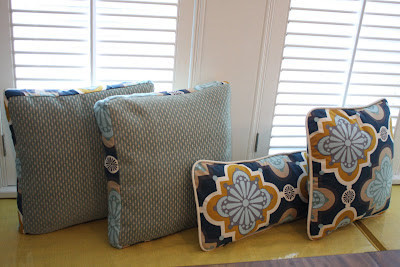
I spent the weekend sewing a bunch of beige accessories for a client's living room. As you probably know by now, I like color, so getting through all of the beige fabric was tedious for me. I made some button tufted pillows ....
and a throw edged with BEIGE cording and top-stitched in a diamond pattern with matching BEIGE thread.

I also recovered the chair  below in the same BEIGE. My client actually liked the fabric pattern on the chair before, however the grease stains were totally gross, so it had to be recovered.....IN THE SAME SOLID BEIGE.
before
after

I'm looking forward to a more colorful week!

Sunday, August 22, 2010

#225...housekeeping

Whoo hoo! I just figured out how to let anyone (not just blogger members) comment on my blog.....in case anyone feels so inclined!

Friday, August 20, 2010

#224...photoshoot at mi casa

I spent the last two days watching Photographer Gustav Schmiege and Field Editor Susan Fox work their magic at my house. The photo shoot of my kitchen and bathroom is for Better Home and Gardens Special Interest Magazine Kitchen and Bath Makeovers, and it was so much fun, and such a great honor to have Susan and Gus shoot my home.

I really learned a lot from both Susan and Gus. Susan has a great eye, and it was so interesting to see how the staging for a photo shoot is different from how you decorate to live in a space. It differs more than I thought it would from either my decorating experience or my real estate staging experience, and I can see that it takes some practice. Additionally, Susan's job was to make sure that all of the requirements and shot requests that the magazine editors sent were met. I really enjoyed watching her work, and think with a little training, I might be good at being a photo stylist. Also, Susan wrote the nicest little write-up about me on her blog Love Where You Live.

Gus is an awesome photographer. He had some of his portfolio with him, and I really enjoyed looking through it. His work is really worth a look online here. He was so easy going, and answered a million camera questions that I was throwing at him, and even helped me better understand my own Canon camera. His job was so much more involved than I imagined, as he spent as much time setting up each shot as he did capturing it.

The little owls above are holding leftover remnants of some of the staging flowers from the shoot. I tried to make them little hats from the bits of flowers. Here are some of my shots of Susan and Gus hard at work.


....more leftover flowers for us to enjoy this weekend!

Wednesday, August 18, 2010

#223...mrs. meyer's to the rescue

I have been manically cleaning in anticipation of a photographer and stylist's visit to my house. I am addicted to Mrs. Meyer's Clean Day All Purpose Cleaner in Lemon Verbena. It lasts forever because it comes as a concentrate that you dilute. I have been looking for creative uses for my remnants of chalkboard contact paper that I used here on my cabinets. I put some on an old, clean spray bottle, filled it with Mrs. Meyer's dilute and voila'....cleaning is almost fun.

Monday, August 16, 2010

#222..."toofer" pillow

In clearing out my blog fodder folder, I came across this pillow that I made for my client Hilary a few months ago. I saved it to share the idea of splitting a pillow to make two pillows from one. The pillow was from the Victoria Hagan line for Target, cost $30, featured the same circle print on both front and back, and in my opinion, came stuffed with some pretty sad, frumpy poly-fil. Here it is before.
Using scraps leftover from her dining room window pelmet (obviously the reverse side of the fabric) I was able to make her two circle print pillows from one. Also, I added yellow welting, which is much more colorful than the original brown.

Friday, August 13, 2010

#221...sara's coffeetable & clock

I have been helping my client Sara add some life and color to her family room/playroom. We started with this "pressed flower" fabric by Anna Maria Horner.
I made her a bunch of pillows with a coordinating chenille print.

I painted her this small end table to fit between her sofa and club chair

....and this week, I finally delivered her coffee table, that features a chalk board top that I painted with this Rustoleum chalkboard paint. Prior to delivering it, I cleverly conditioned the board with blue chalk by rubbing it all over and wiping it in, which is a recommended practice with chalkboards to keep the chalk from leaving a permanent stain. Every once in a while you are supposed to clean your board with water. Within two seconds of being there, her two-year-old rubbed his hands on the table and then on the couch leaving blue hand prints.   Oops.....I forget about the kid factor sometimes. She simply washed the chalk conditioning off, and is planning to let the kids draw on it unconditioned, and then when she is sick of the chalkboard can simply paint over it. In addition to the chalkboard top, the base is painted in Noir and Bronze by Pratt & Lambert.

I also found this clock at the Goodwill and attempted to make it over for her room. I thought it would come apart, but it did not, so I had to merely paint over what was there. It's not mine or Sara's favorite, but it is ticking for now, until I find her something else.

clock before

clock after

Wednesday, August 11, 2010

#220...readymade thai red curry

This summer I have been obsessed with this Thai Red Curry recipe from ReadyMade magazine. It was designed for campers, which makes it super easy to make, as it is made from packaged Ramen noodles.
Here is the recipe ripped from the magazine and here is a link to it online, along with breakfast and lunch options for campers. I did not have success finding the red curry Ramen flavor at my local grocery, so I simply bought the Oriental flavor and added curry seasoning to it. I also like to add a little sriracha sauce for spice, and I recently started adding some pan grilled shrimp to it. I love it!

Monday, August 9, 2010

#219...chalkboards and drawer liners

I am busy getting ready for my kitchen and bath photo shoot, which is just around the corner. This weekend, I decided to line my new cabinet drawers with this gift wrap from iota that I picked up at my local HomeGoods for $2 a roll.
To line the drawers I measured the drawers and then cut the paper about a 1/4" bigger than needed. I used double sided tape to adhere the liners. I placed a few pieces of tape in the center of each drawer and then smoothed the paper toward the sides and trimmed the excess with an X-acto knife. Then I put a small piece of tape under each corner.

I also decided to turn my upper cabinet doors into chalkboards using this Contact chalkboard paper. It was really easy to apply, I just had to go slowly, smoothing as I went.
I bought this Crayola drawing chalk and did a little color test on the left door.

Friday, August 6, 2010

#218...sumer's desk chair

This vintage desk chair has been living in my attic for the past few years.
Recently, my friend and client Sumer decorated her guest bedroom, which also serves as her craft room. She chose a palette of white, gray and bright yellow for the room. I painted and reupholstered the chair for her, and today it went to its new home.


I also painted this vintage crystal (and formerly gold) lamp for the room
and this formerly black iron mirror got a coat of white spray paint
and a coat of pearl glaze.